








T/S photography by lb_supertec.
Hi,
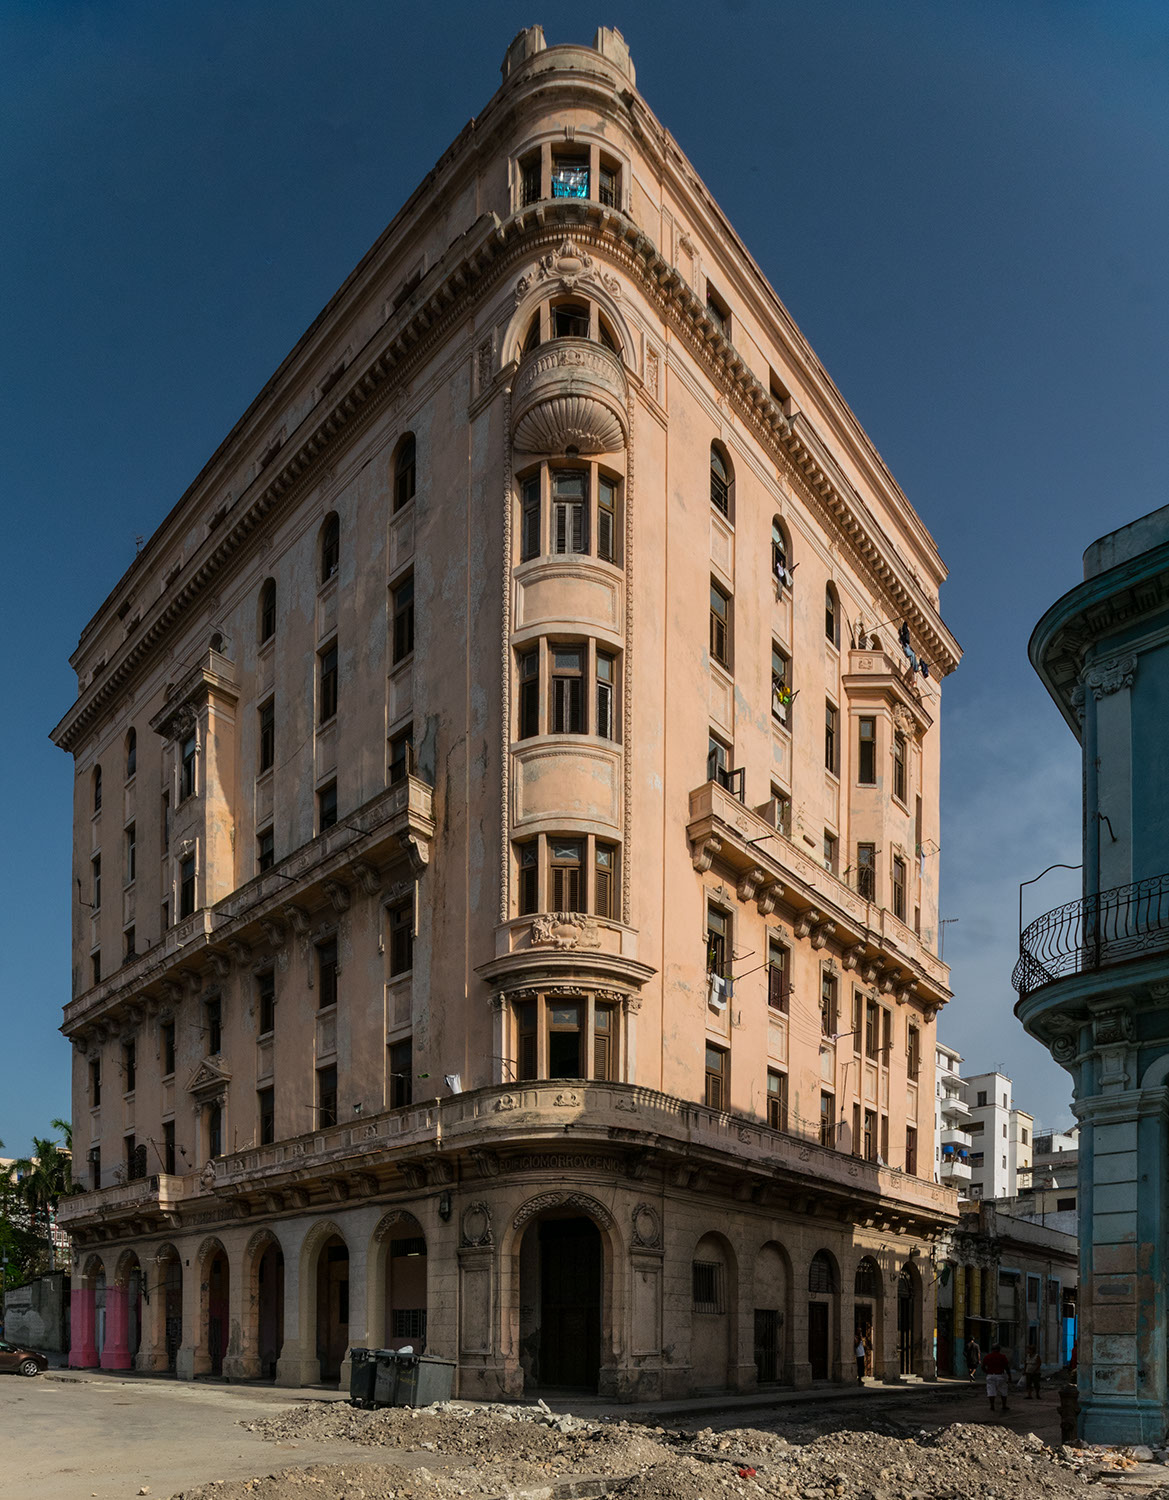
since my first m4/3 camera i was waiting for a super wide angle shift lenses for architecture photography. In post processing it is easy to make perspective corrections. But sharpness and resolution goes down and it is always a risk if you do not see the final image while shooting.
Therefore I decided to go for a T/S adapter. The optic should be a sharp super wide angle zoom with a large image circle for a wide rang of shifting. Furthermore I wanted to have control over the aperture.
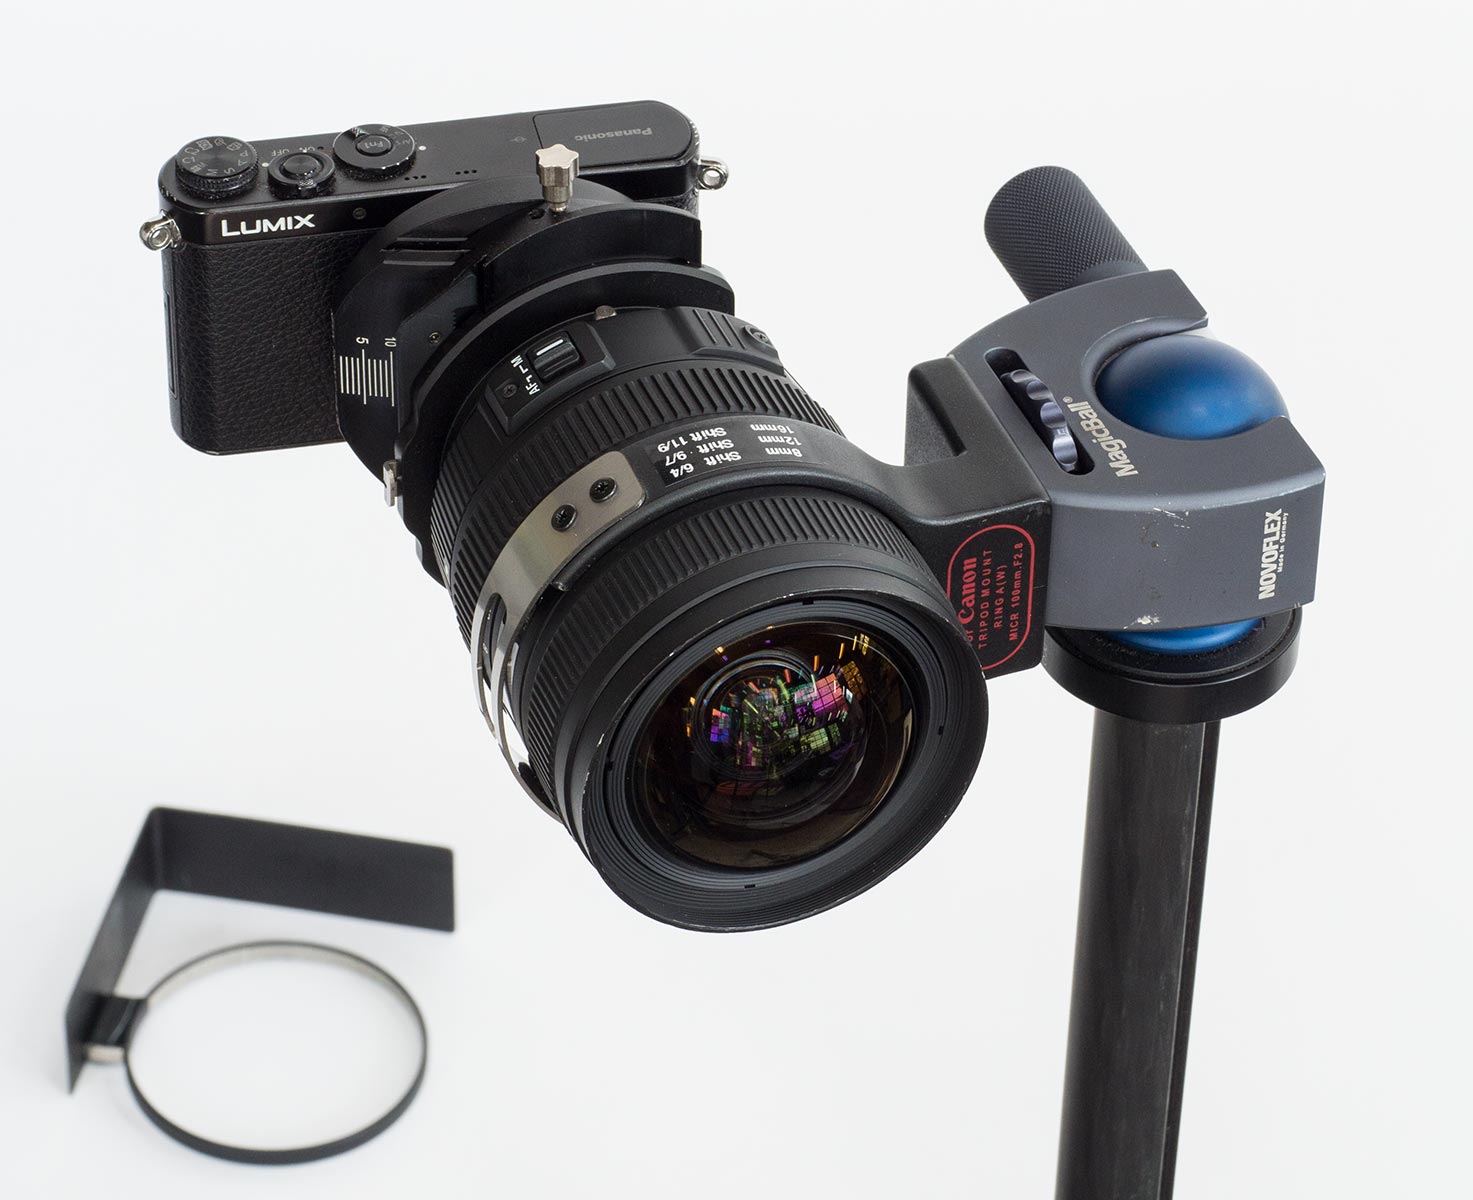
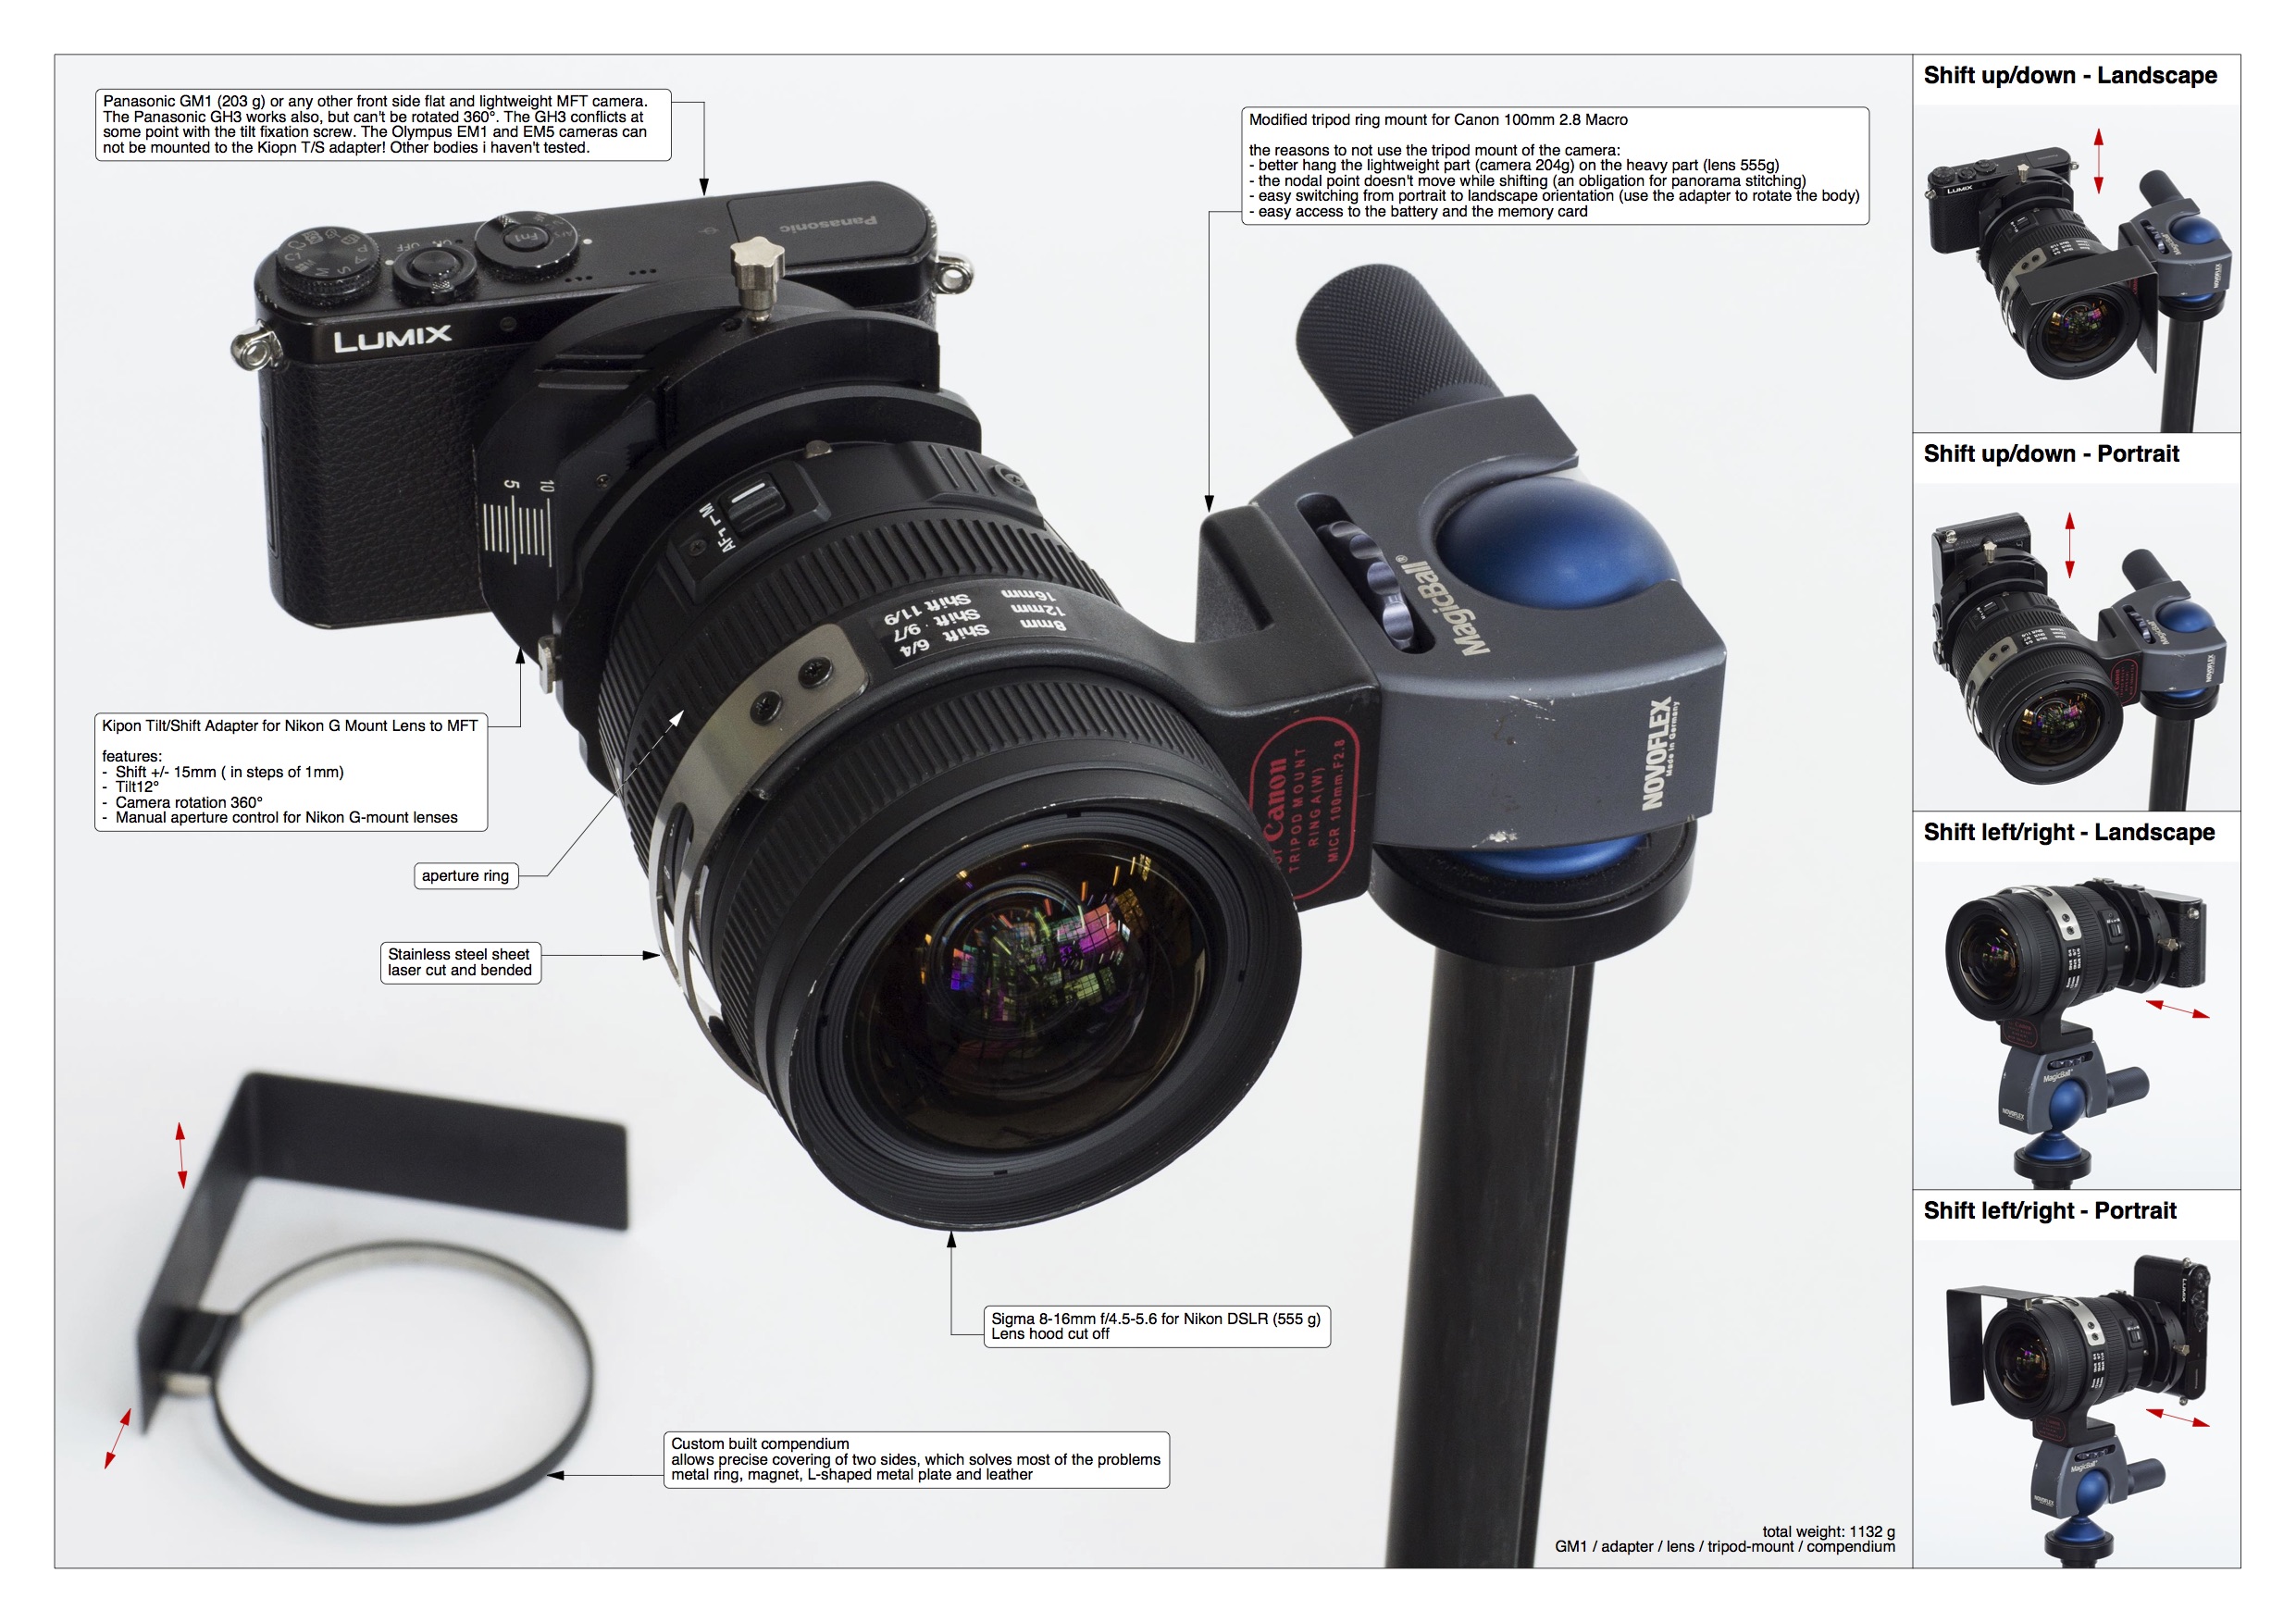
My choice went for the [shoplink 53979 ebay]Sigma 8-16mm for Nikon[/shoplink] and the [shoplink 53980 ebay]Kipon T/S Adapter for Nikon G Mount Lens to M4/3[/shoplink]. This is one of the rare combinations which allows you to handle the aperture manually on a contemporary lens. The built quality of the kipon T/S adapter is good. it allows tilt, shift and 360° rotation, and there are 5 operation buttons positioned around the adapter. For a comfortable handling it’s recommended to use a lightweight and front side flat camera like the GM1. All the pro grade bodies with front side sticking out flash or EFV will cause problems. Some can not even be mounted (EM1, EM5…) others operate only with limitations (GH3). An other problem of this pro bodies is the large weight compared to the compact M4/3 cameras.
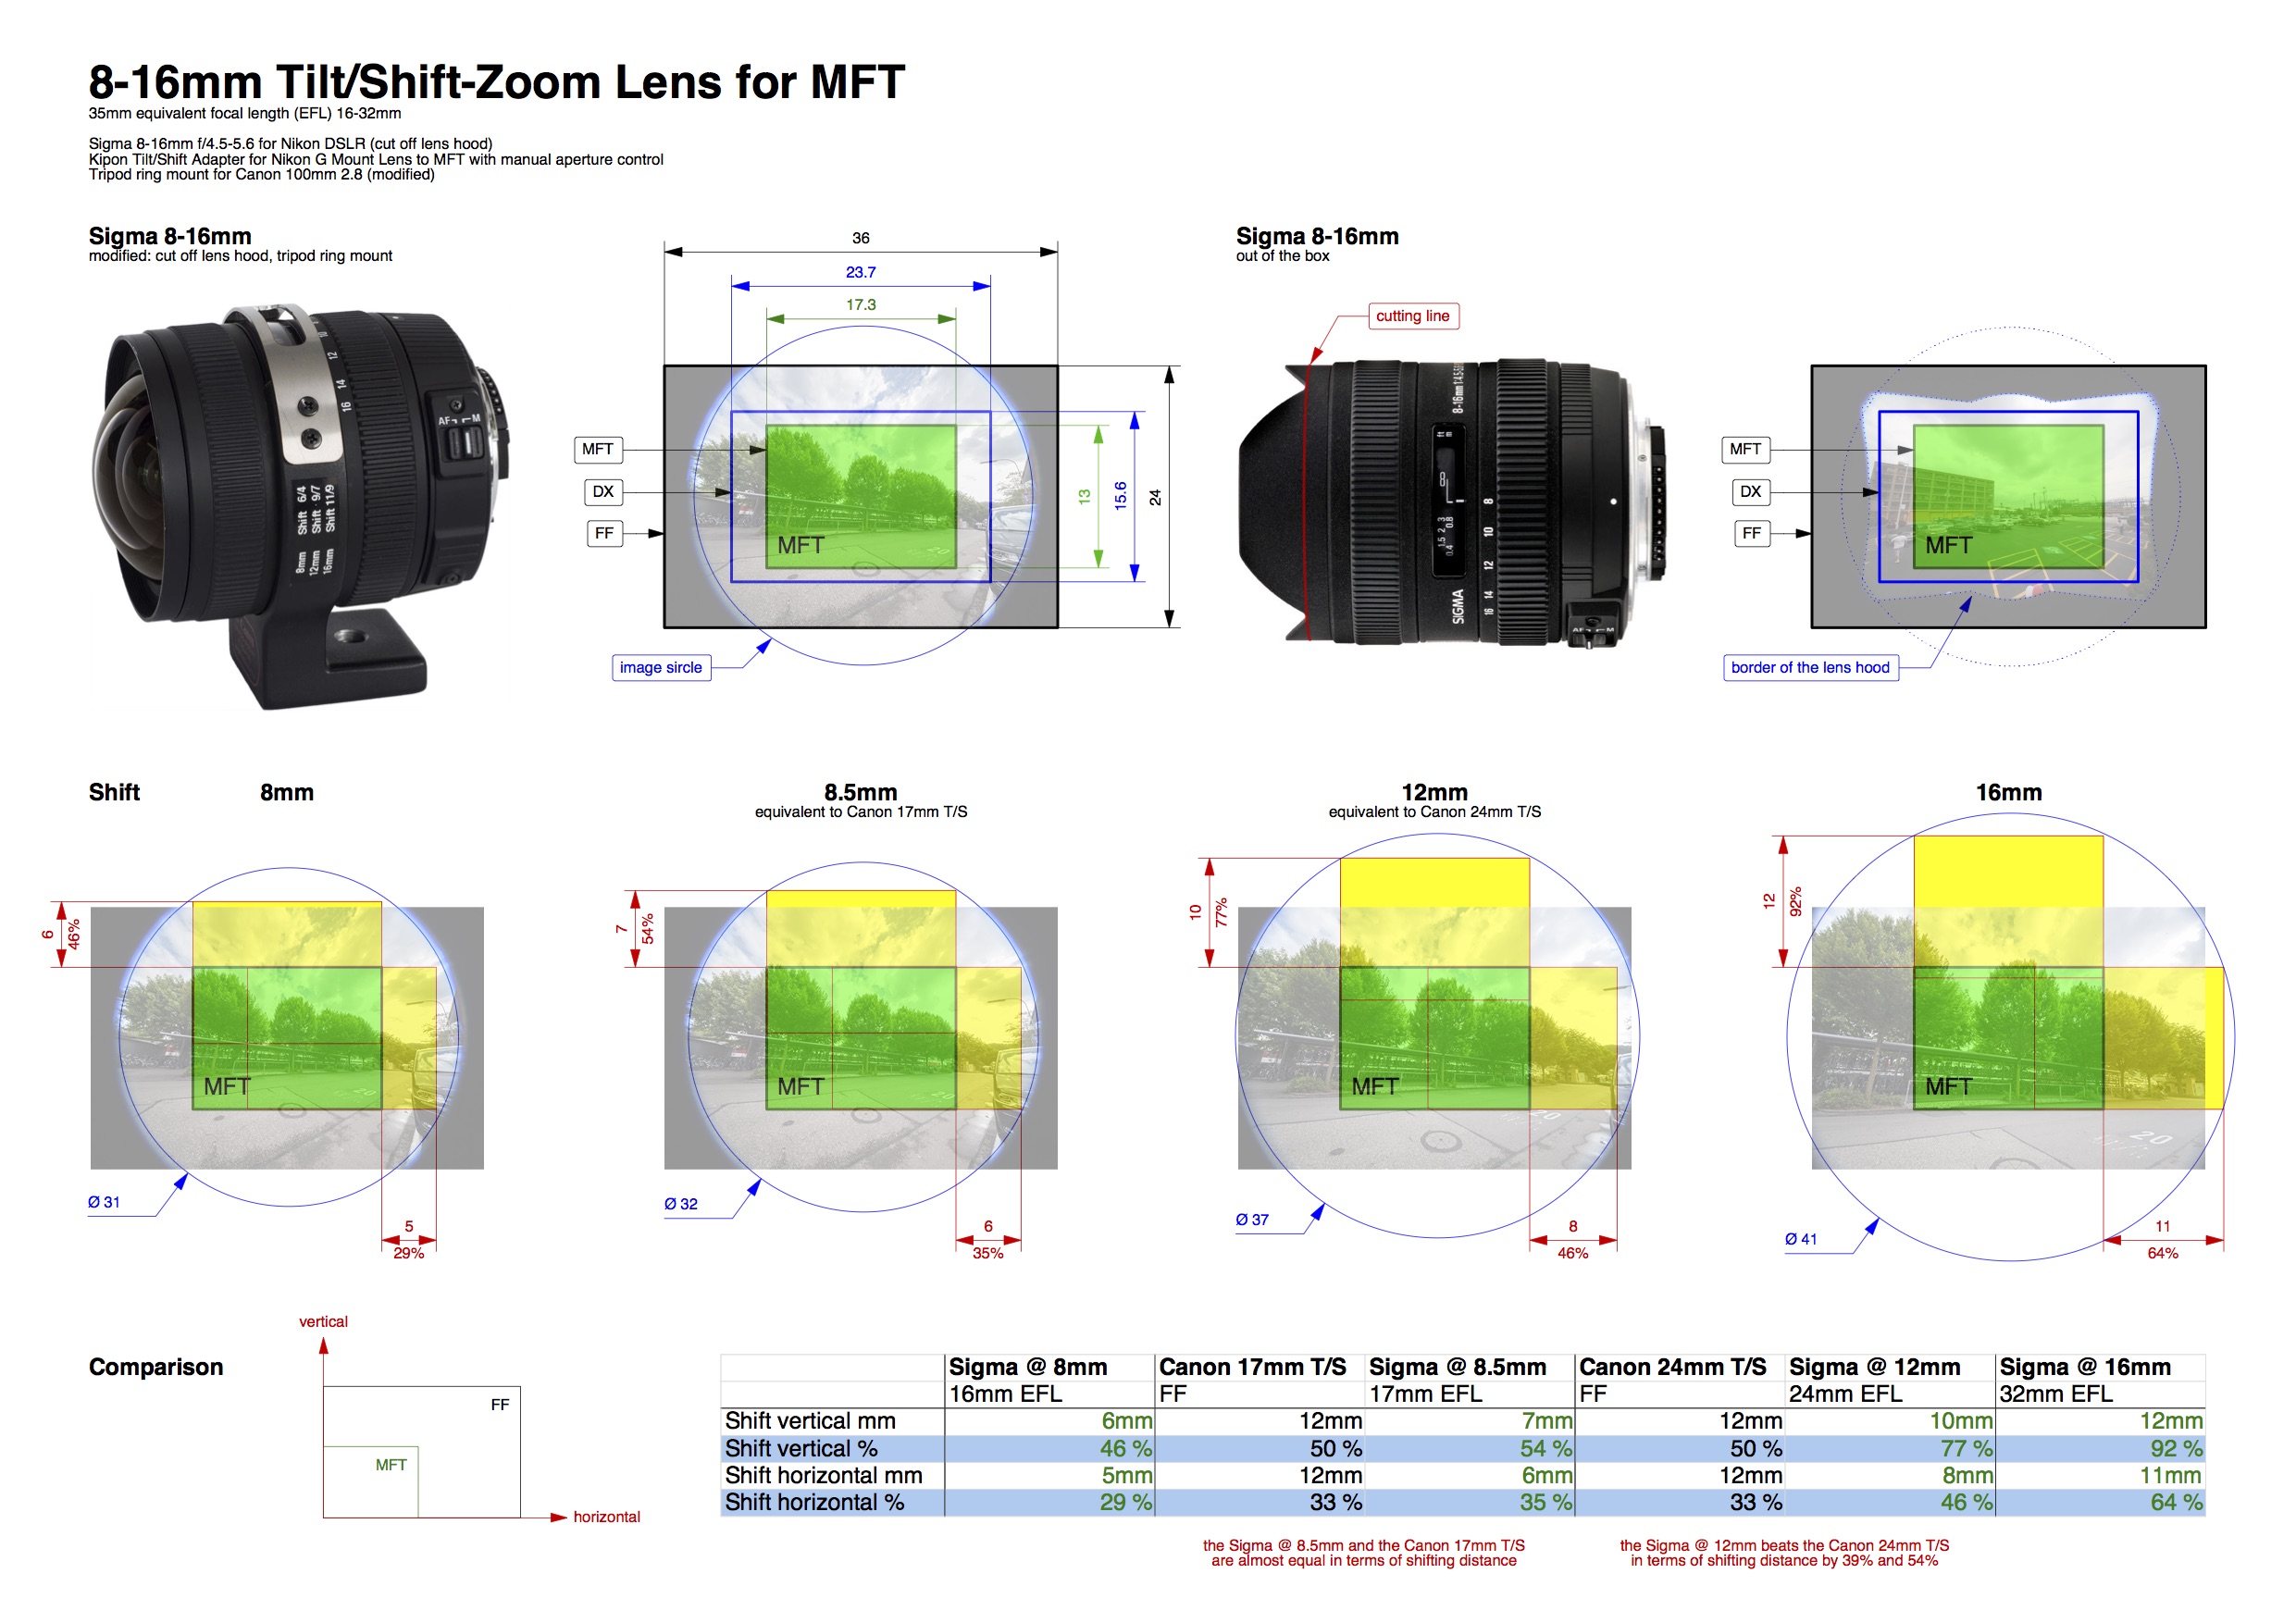
The 8-16mm is a super wide angle zoom and therefore ideal for architecture photography, and it is sharp. The cons of this lens (CA, distortion and vignetting) can be solved with some clicks in post processing and aren’t a issue for me. Out of the box the 8-16mm offers only limited shifting due to the built in lens hood. Therefore I decided to cut off the lens hood to get access to the entire image circle of the lens. trough this it is possible to shift unrestricted in any direction until the border of the image circle. Shifting of my sigma is now on par with the canon 17mm T/S and even better than the canon 24mm T/S!





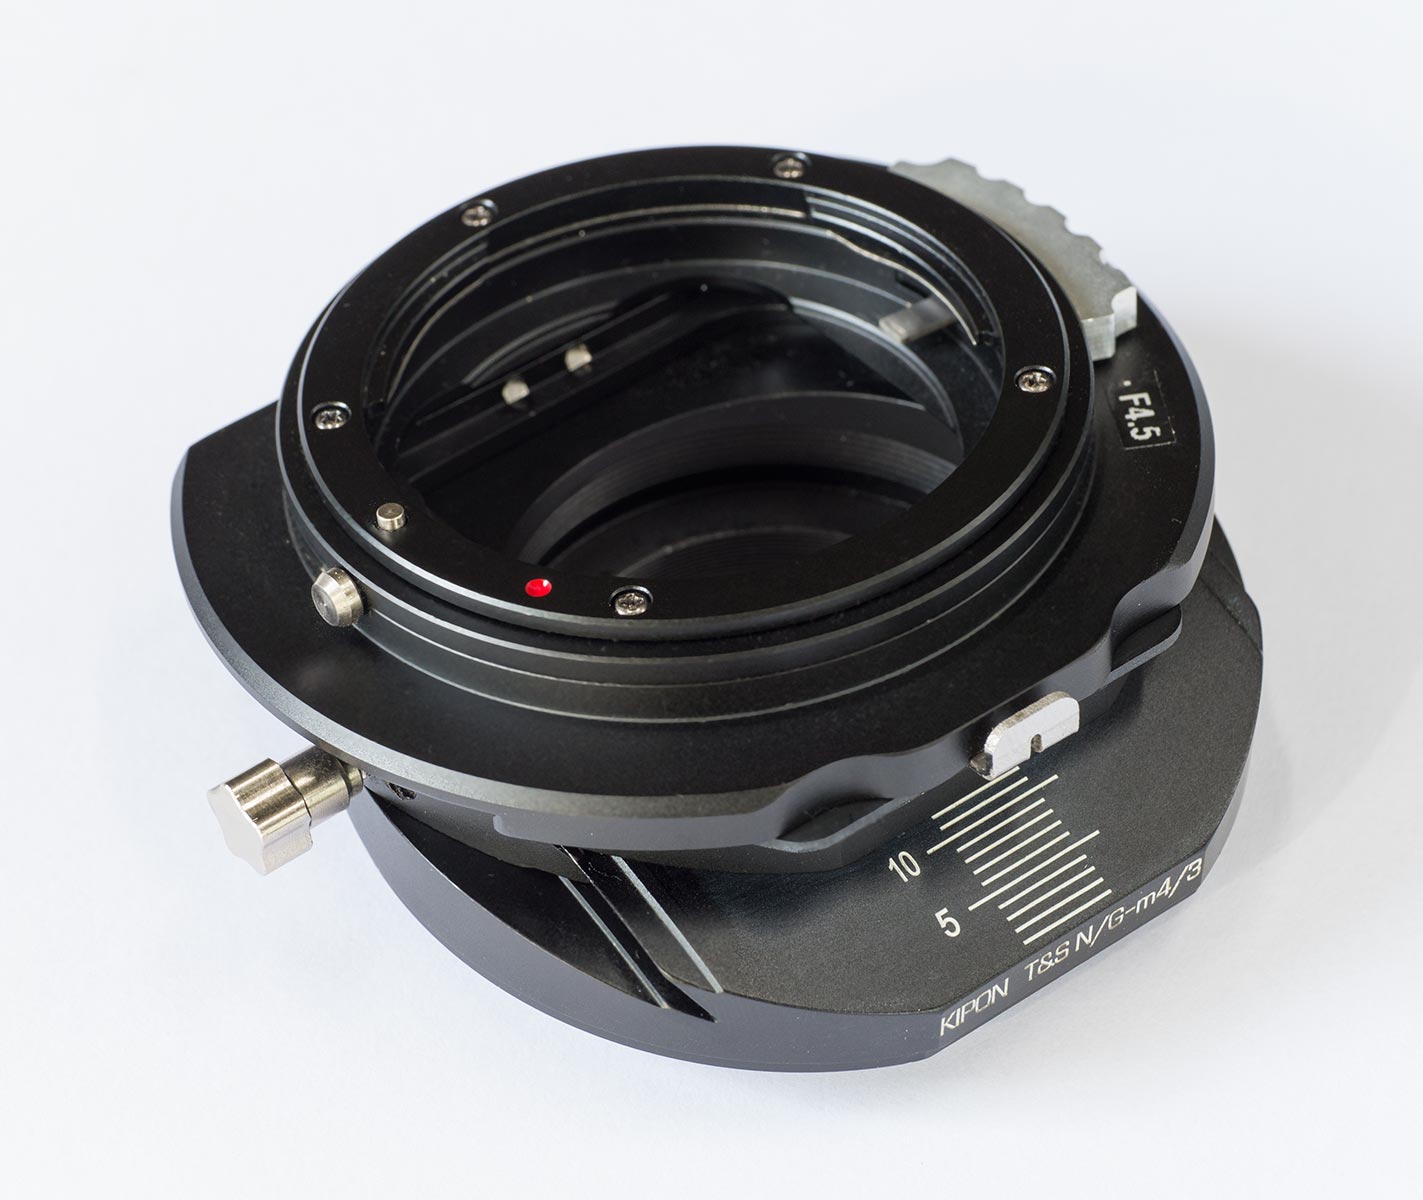
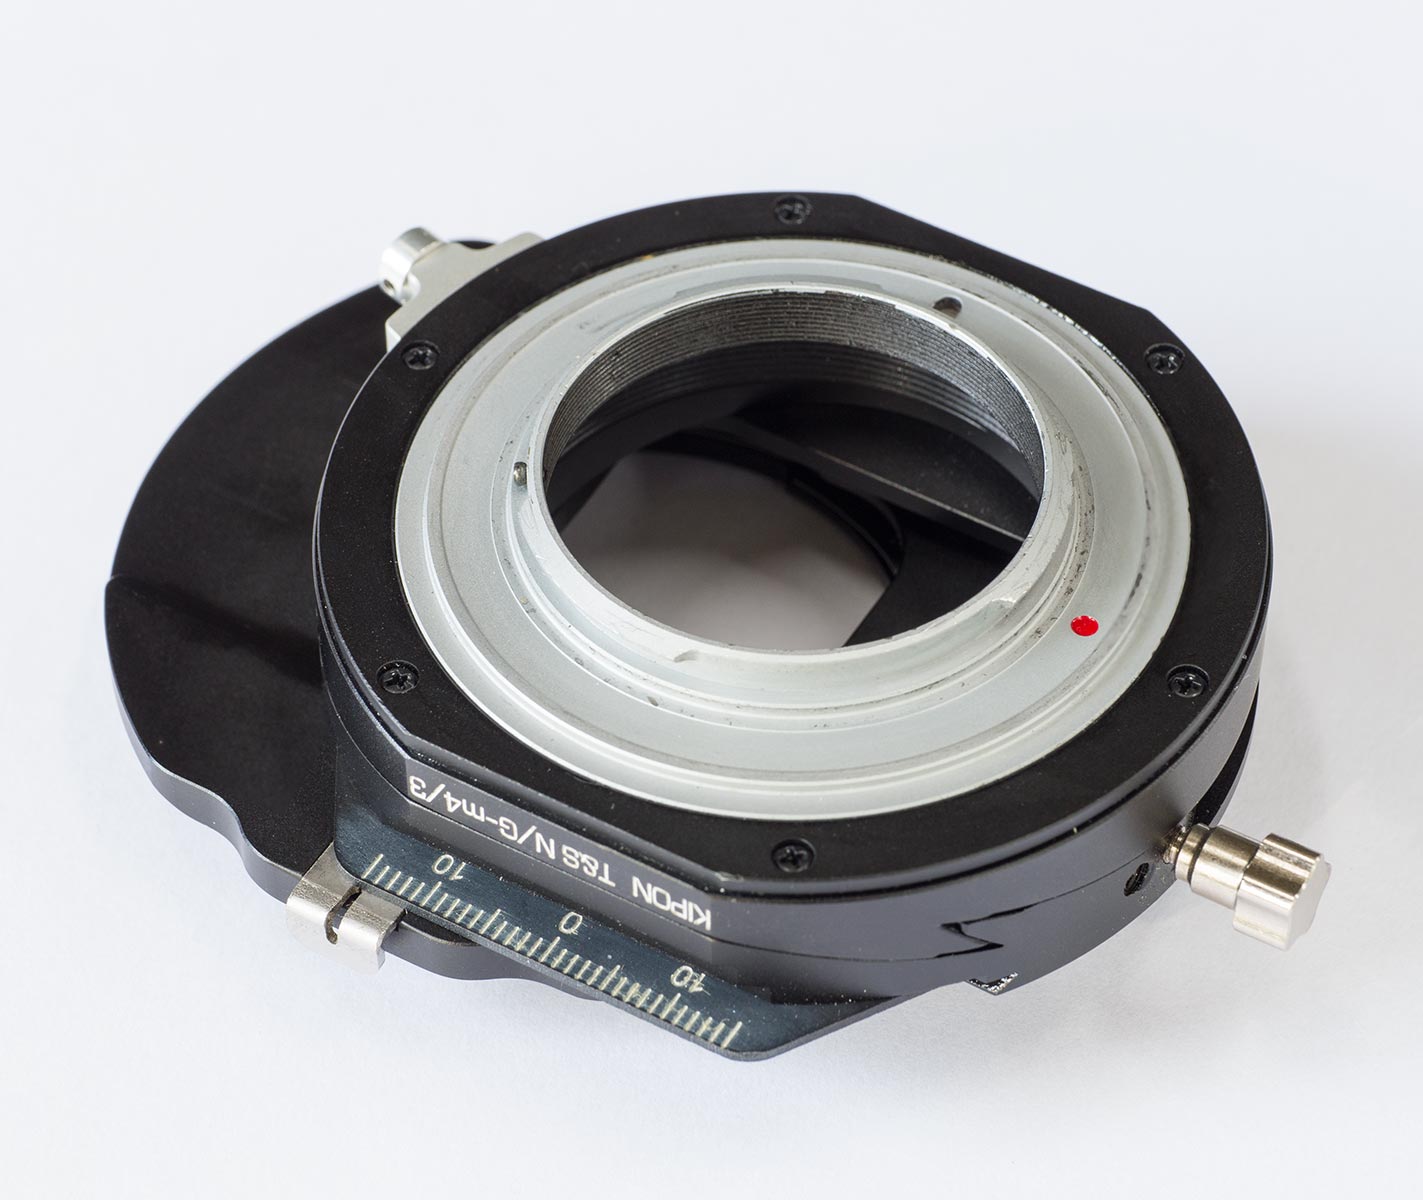
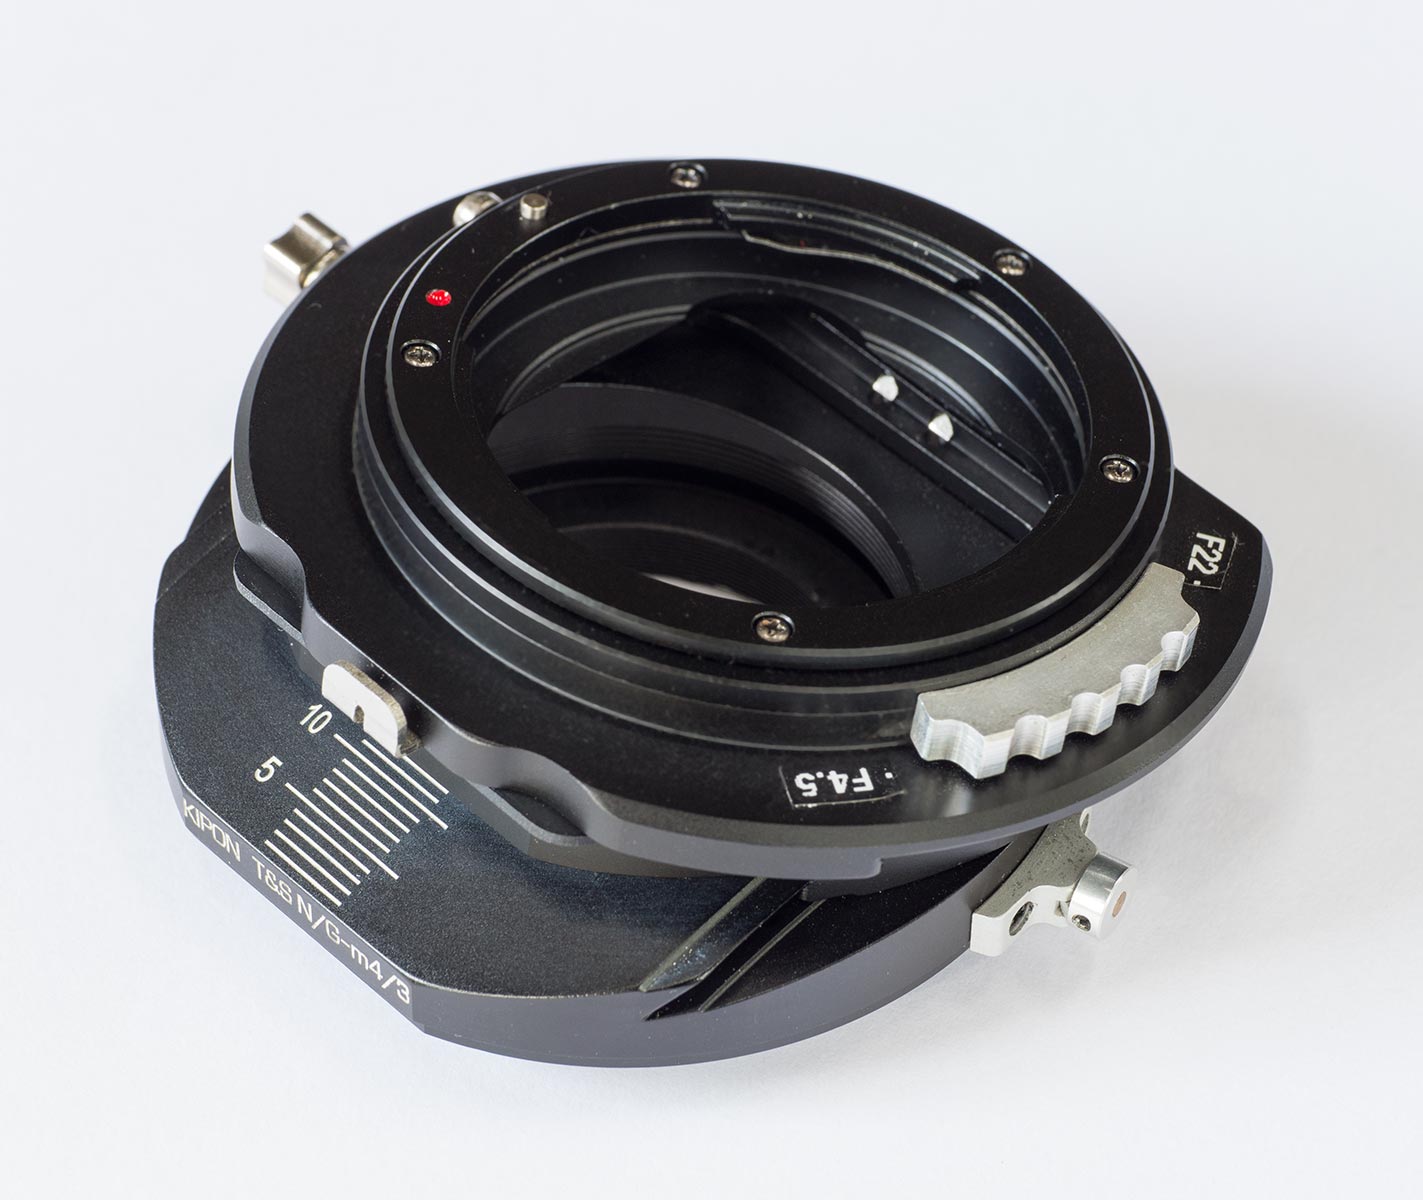
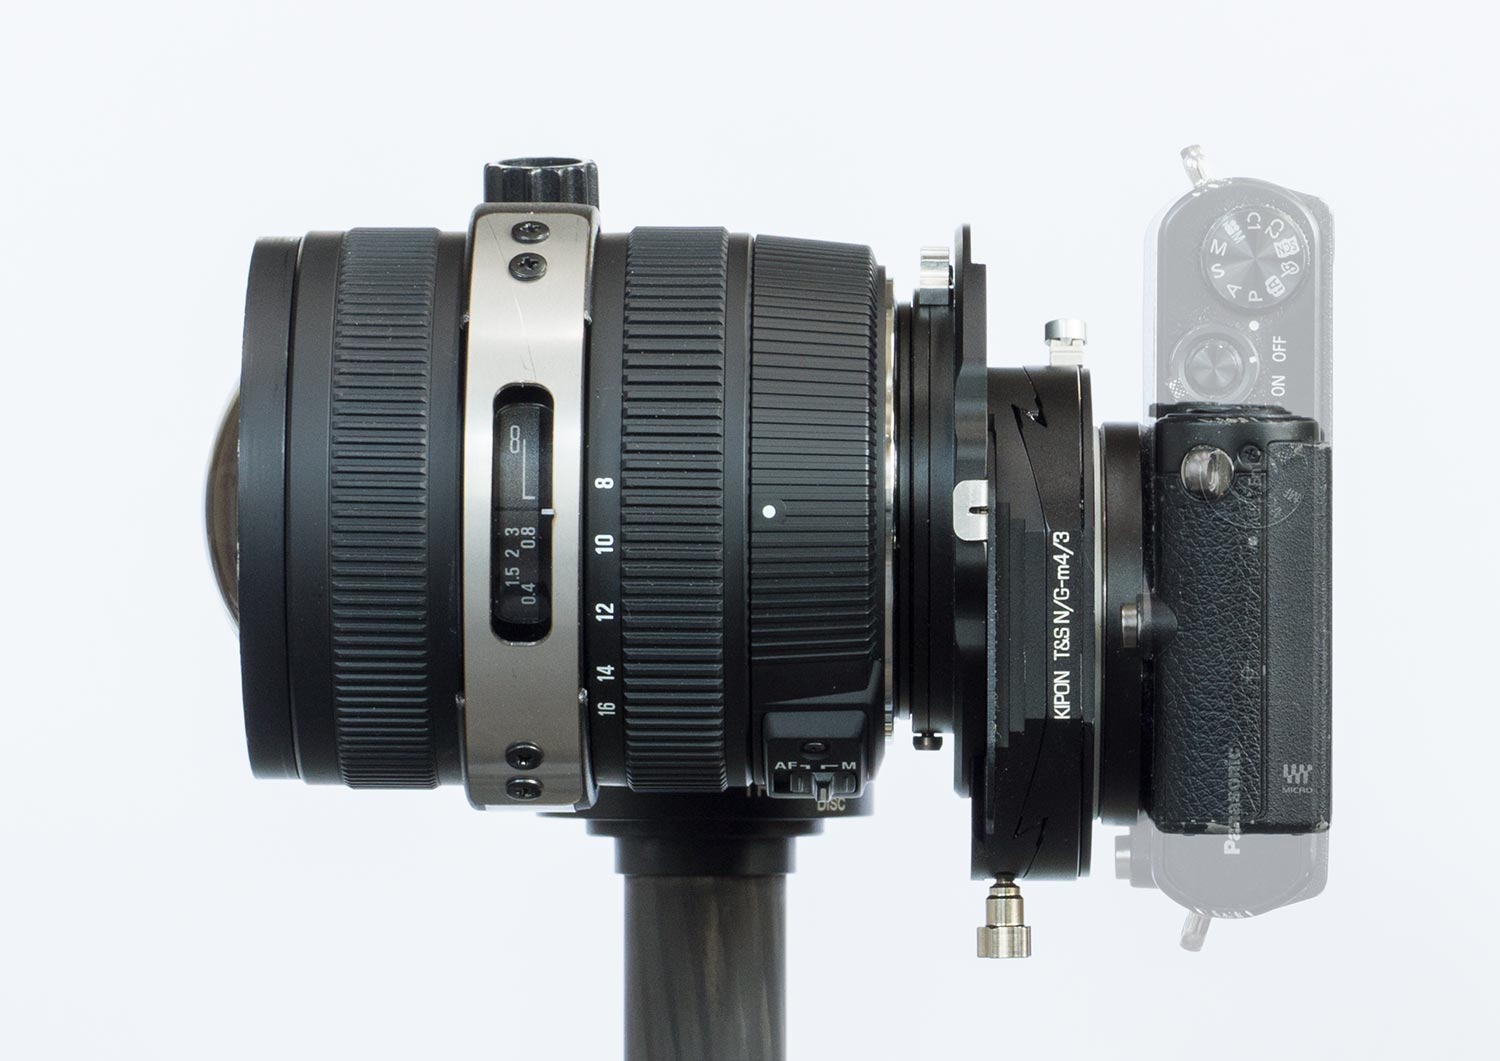
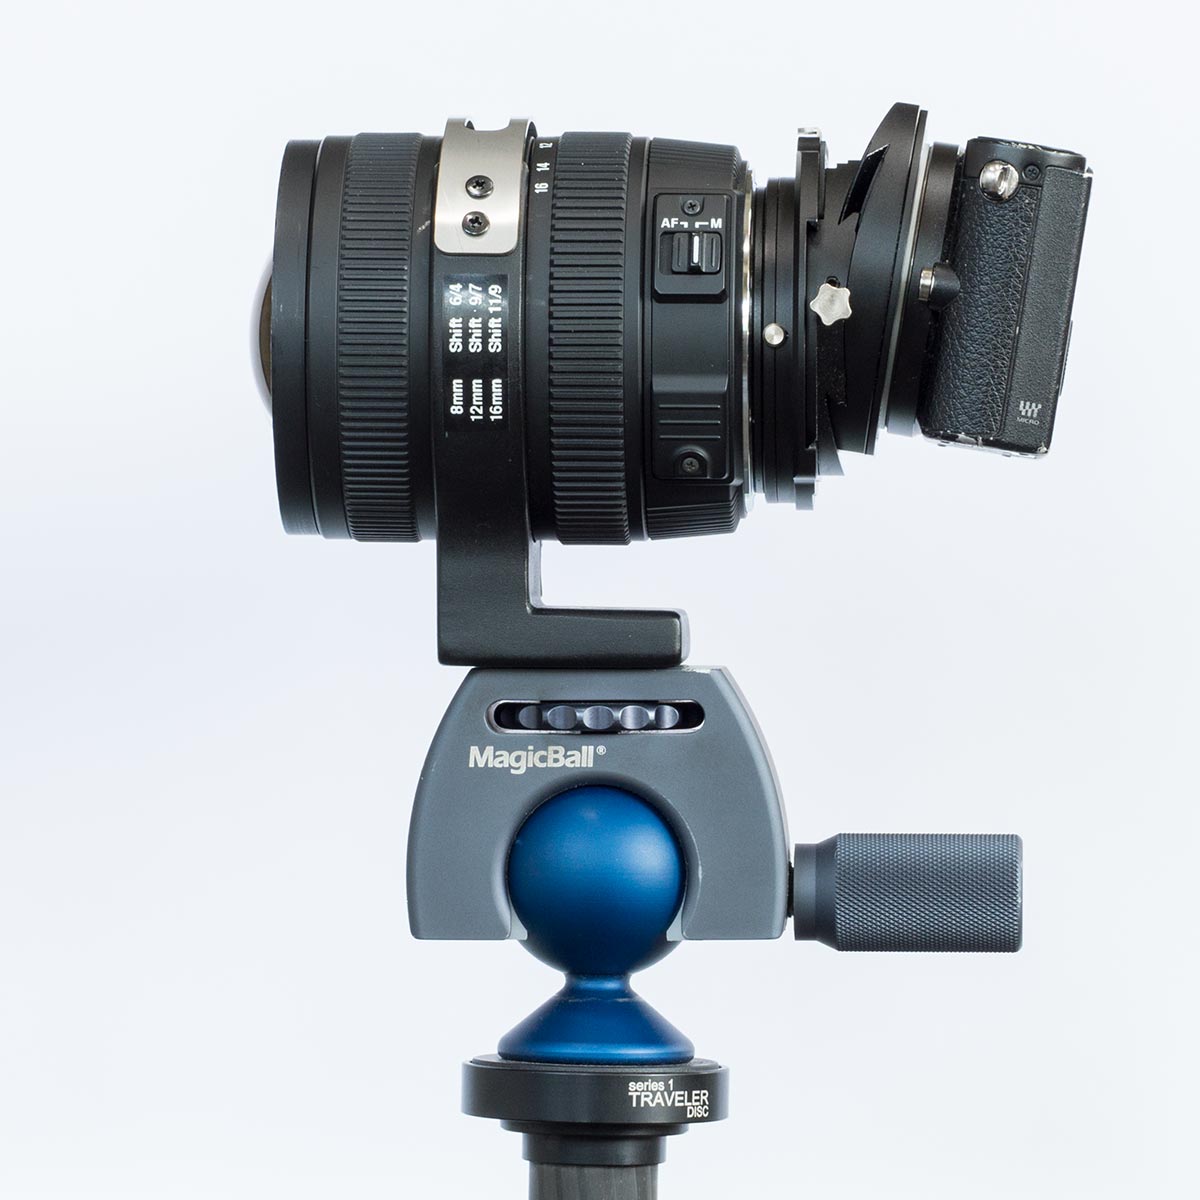
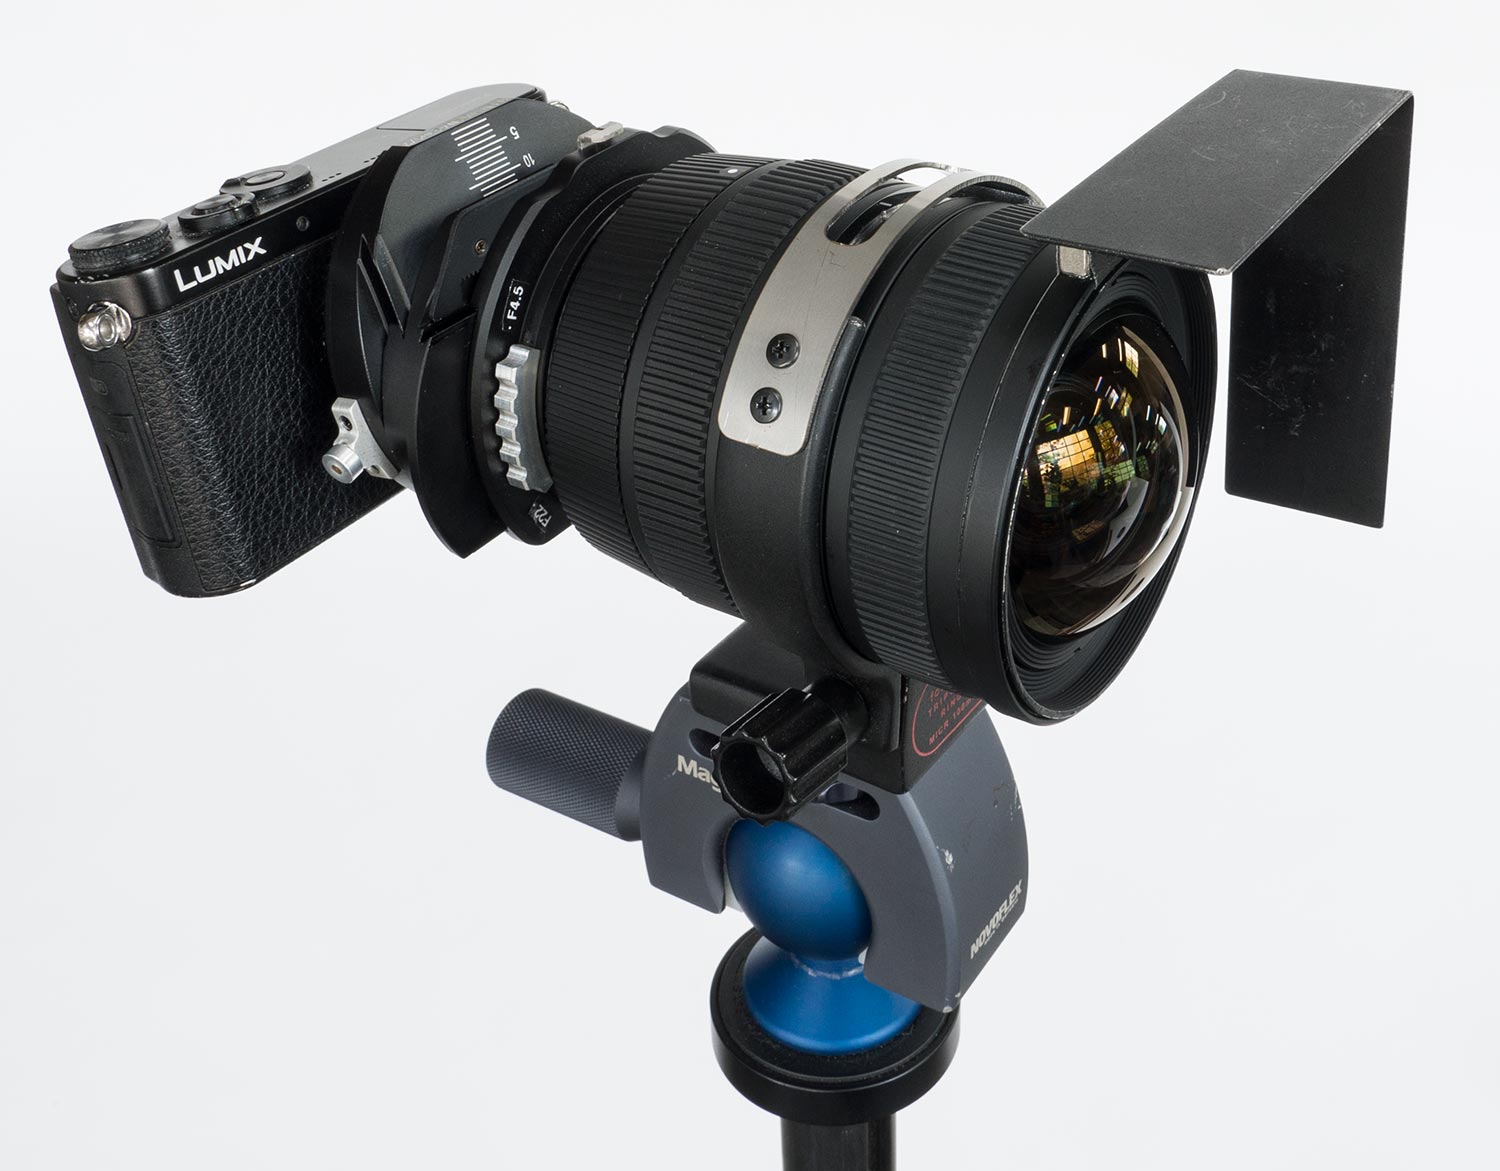
Furthermore i built a tripod ring mount for the lens. This way it’s the body which moves and not the lens, and obligation if you are planning to stick panorama images out of two or more shots. And its much easier to move a 203g camera (GM1) instead of the 555g lens. the last piece i built was a kind of compendium. That’s highly recommended since the front lens sticks out that much.
Compared to the heroes in the T/S world (canon 17mm and 24mm T/S) this solution is lightweight (928g), relatively compact and much cheaper (1’000 bucks plus one day in the workshop).
During the last weeks i did two city walks and two jobs with this T/S lens and i am thrilled. in short: i own now a easy to use and sharp super wide angle M4/3 T/S zoom lens!
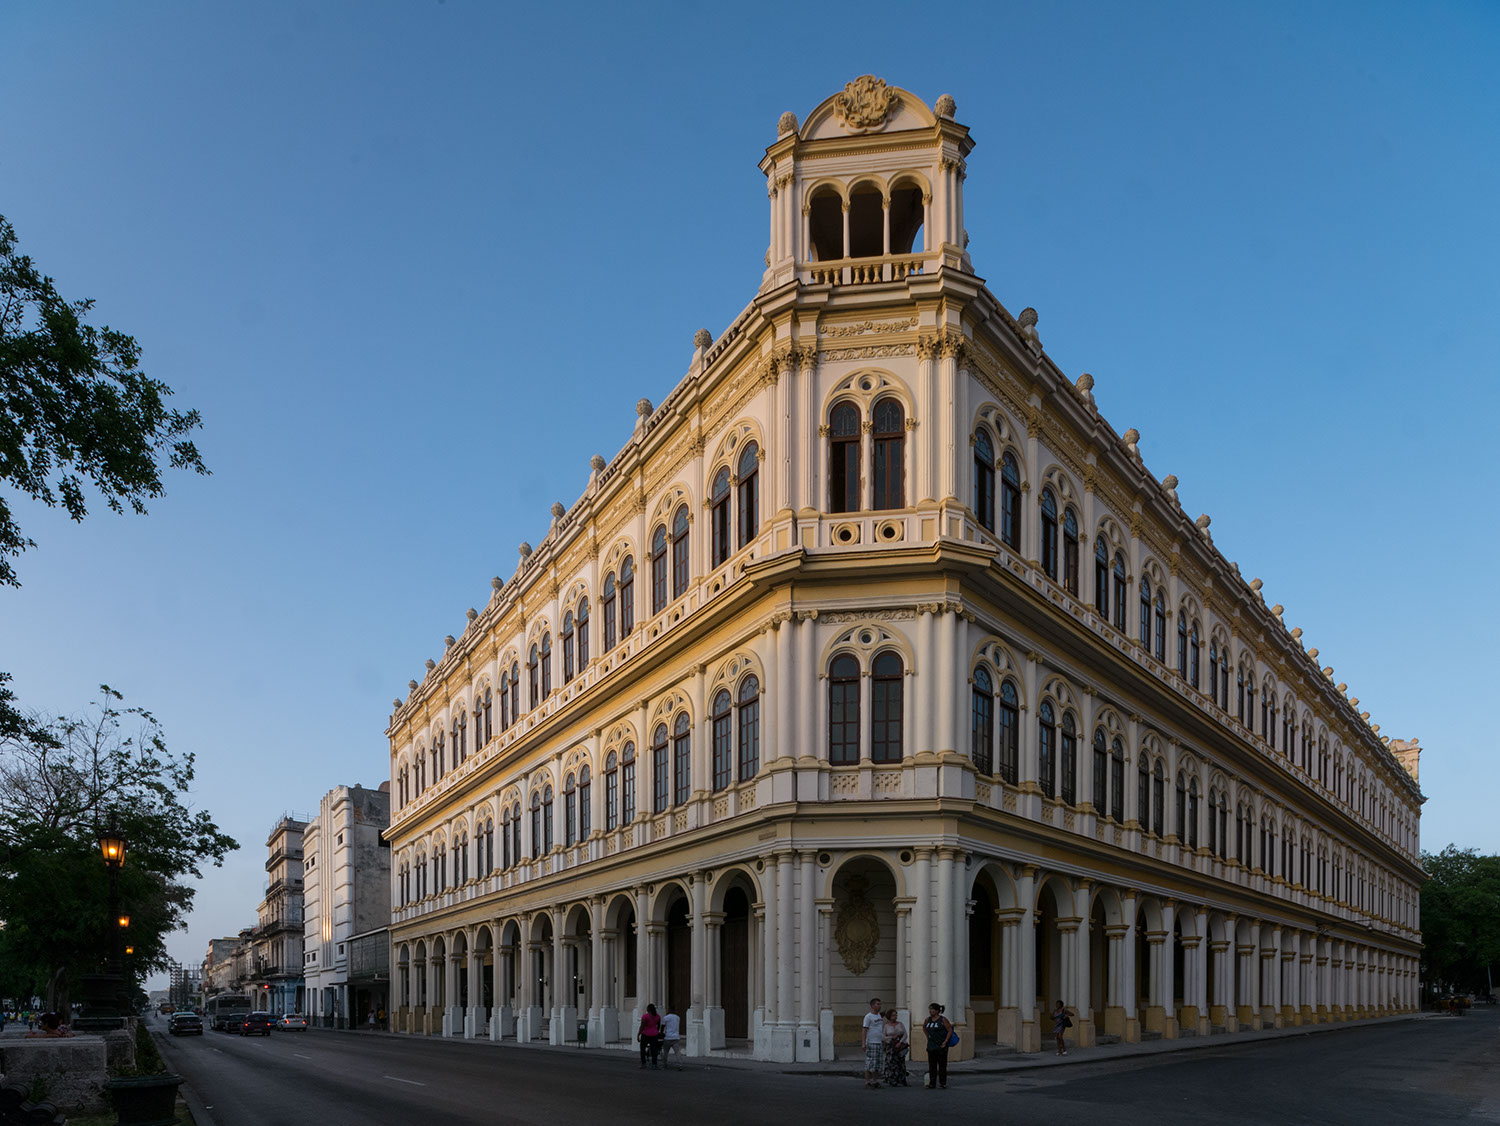
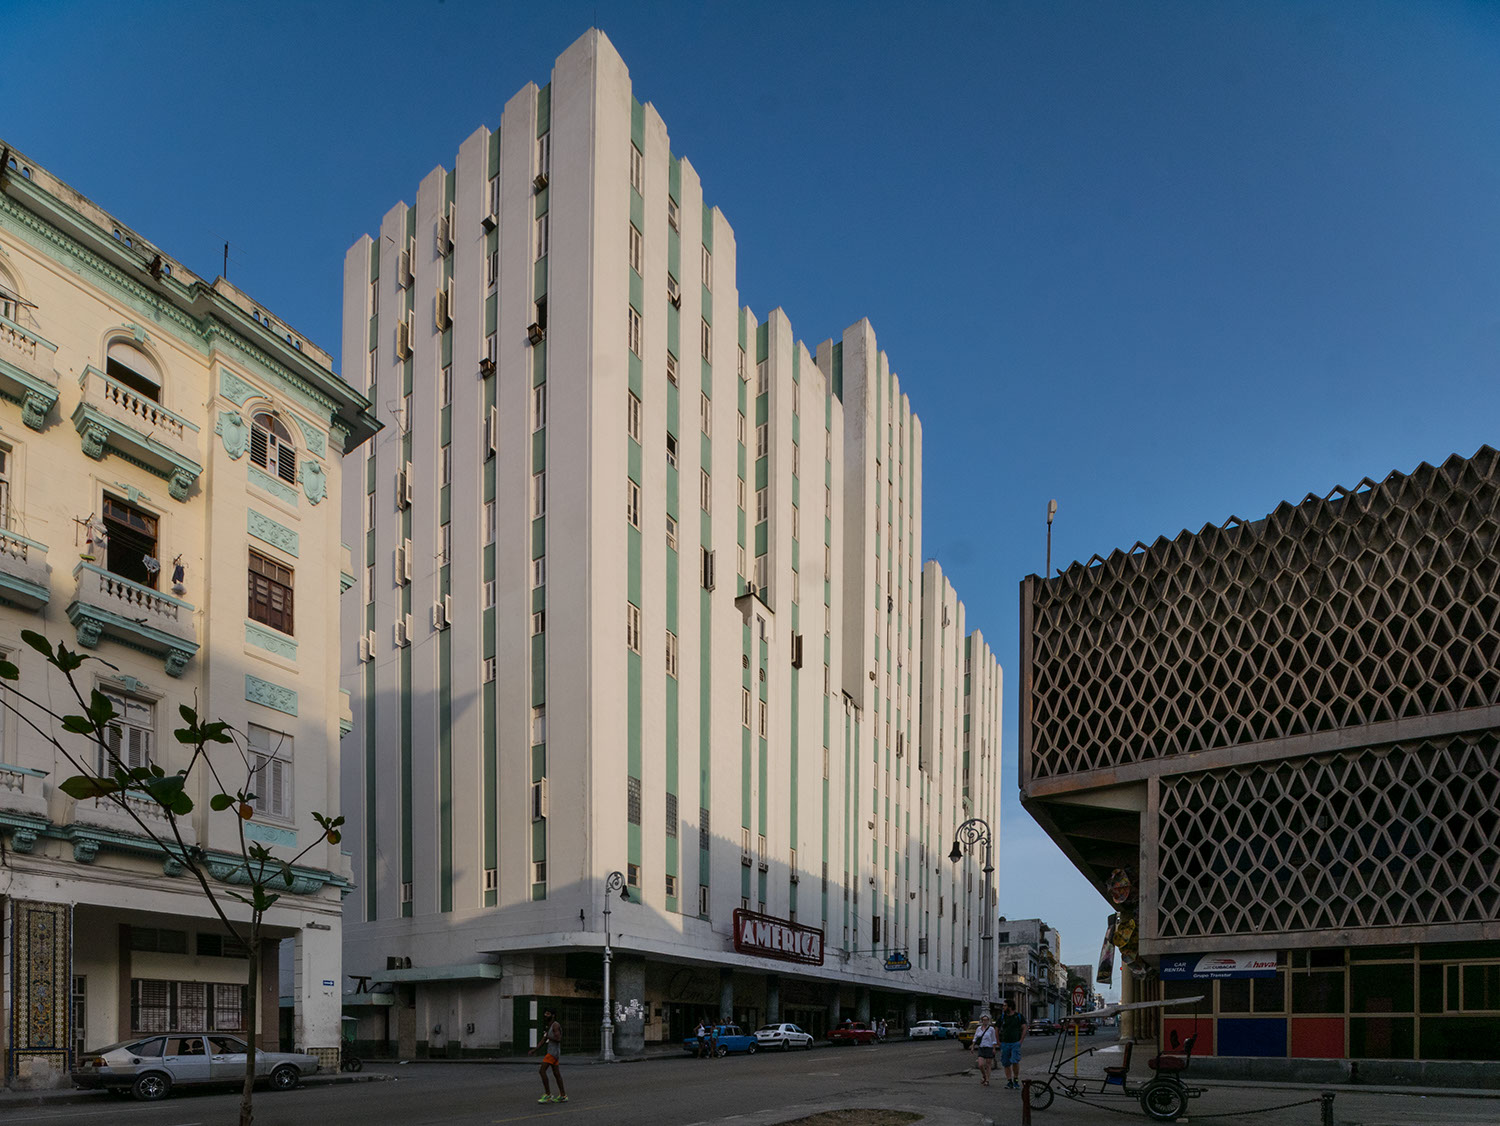
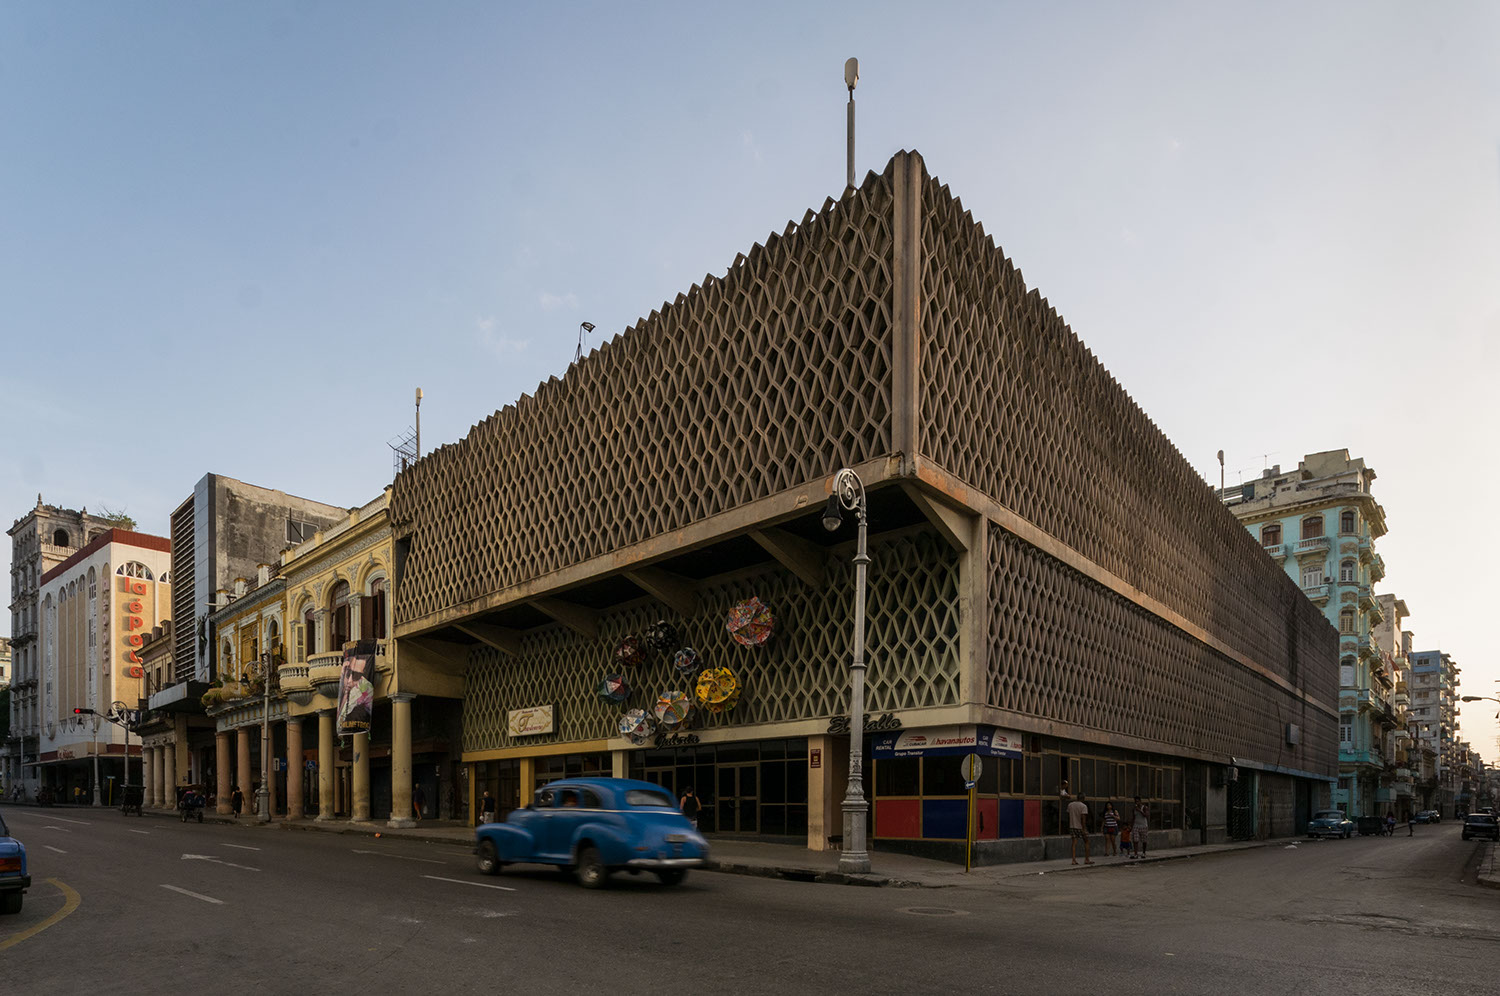
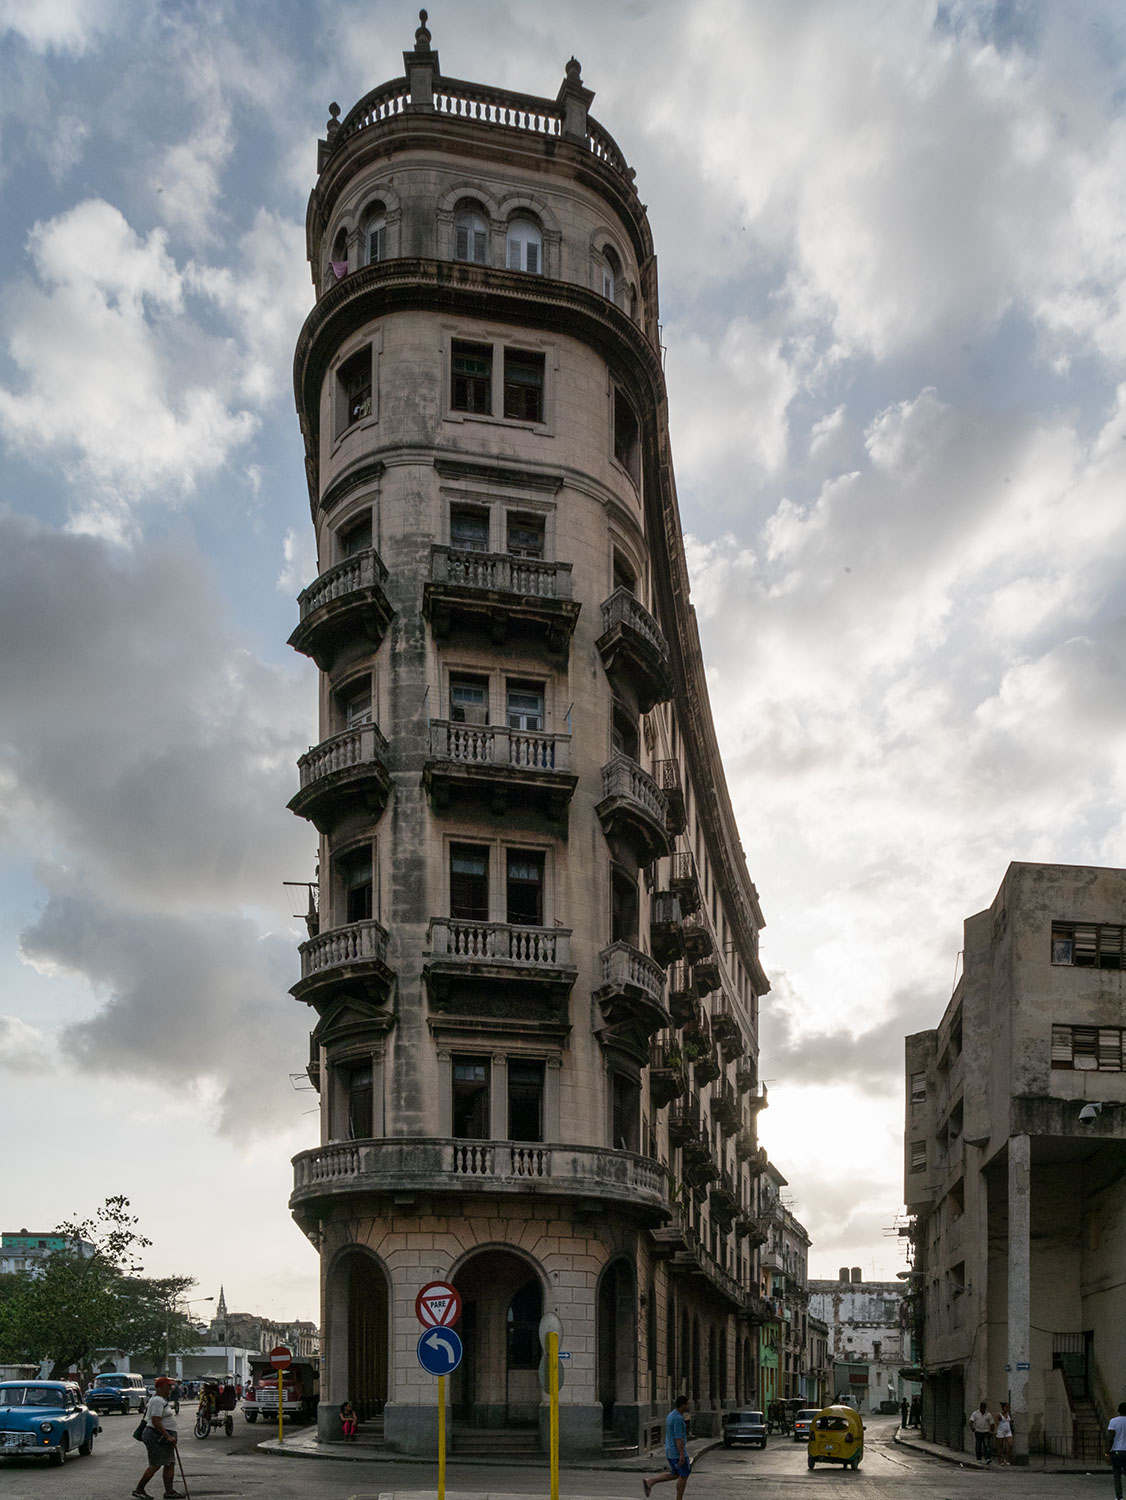
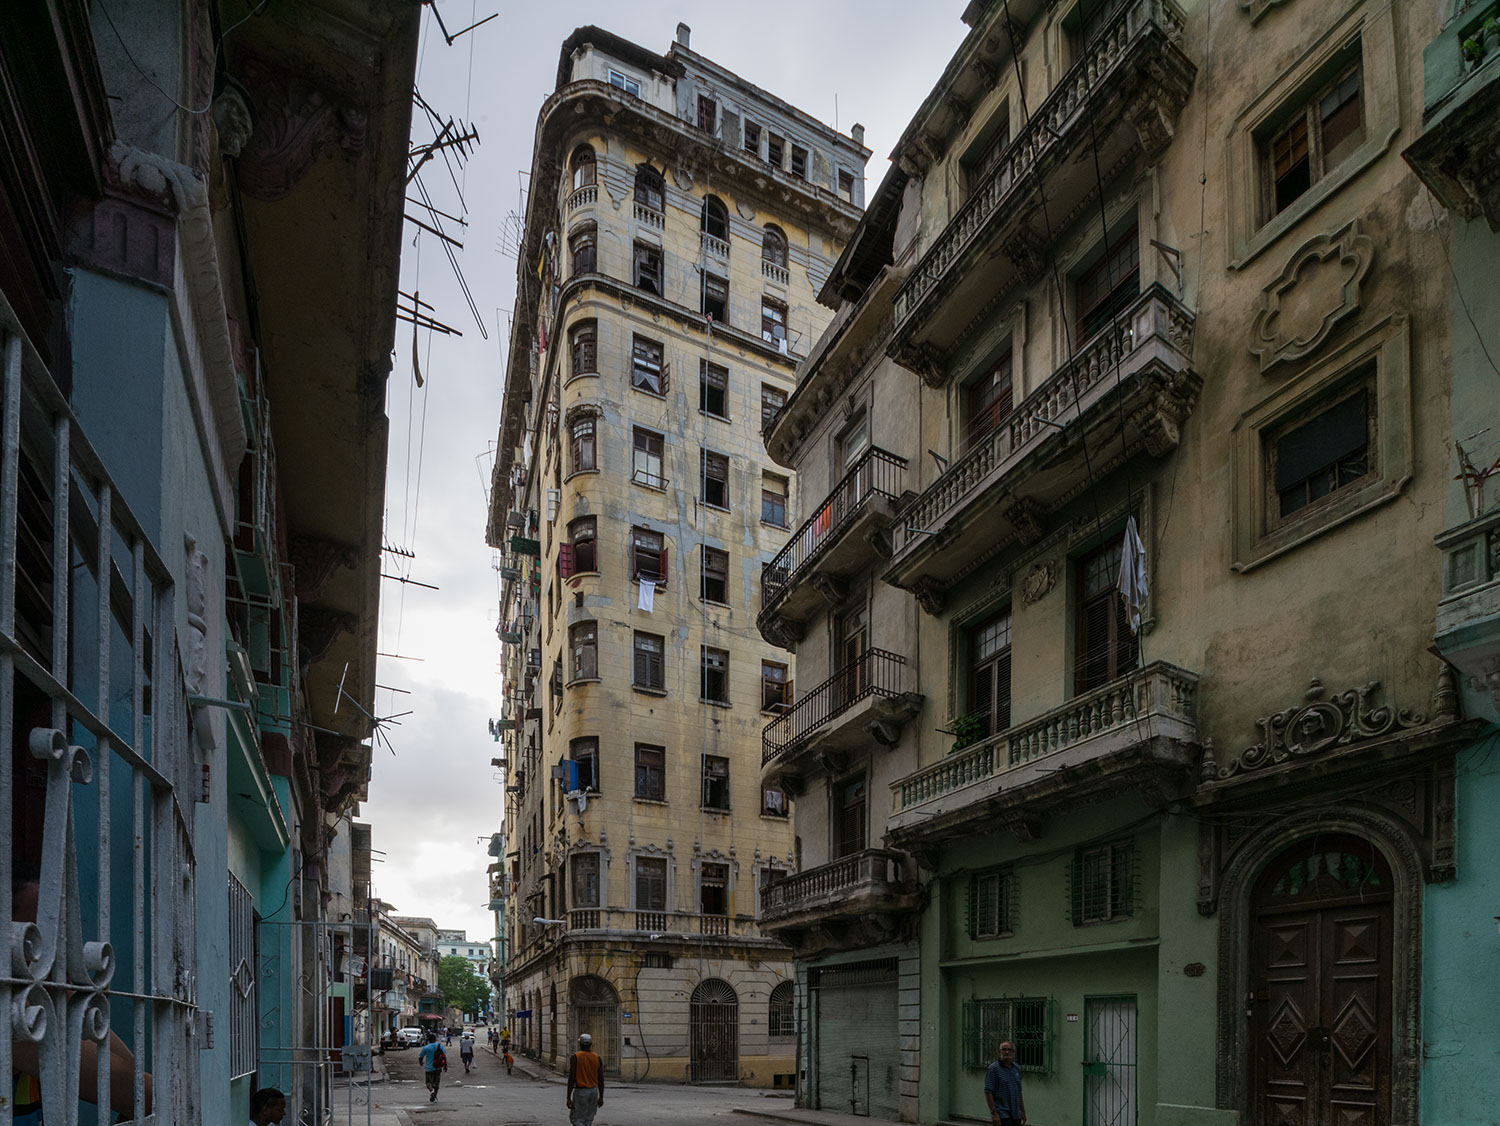
Attached a detailed description and some sample images. the images were shot in RAW and they passed post processing in Bridge. means WB, CA, distortion and vignetting are corrected.
enjoy!
38 Responses
Thank you for taking the time to write up this guest post. Very informative and interesting. Personally I don’t like spending even that much money for my m43 lenses, that adapter + lens together isn’t cheap, and I wish they would make an affordable native solution. But you have found a good workaround. Note that you can buy just tilt adapters for m43 much cheaper on eBay – for only about $50, but no shift feature.
There are shift adapters for just about every 35mm lens mount to u43 bodies on ebay. In fact I have and use OM to u43 and Fuji X mount shift adapters from Kipon.
The shift-only adapter works on all MFT cameras, not only flat front models. That should be sufficient for most architectural photo work, as DOF can easily be achieved at typical working distances by stopping down the aperture.
> and I wish they would make an affordable native solution.
Well, check how much the native solutions for Canon cost. They are nowhere near “affordable”. This is a specialist lenses, as such have limited market, and consequently high cost.
Some even opined that m43 is not suited for WA TS due to mount design/flange distance limitations. IOW, a native TS lens wouldn’t be much smaller than what Lang got with an adapter and the Nikon DX lens.
> you can buy just tilt adapters
Haven’t seen any decent comparisons or reviews. Going by just the reviews left by users in the on-line shops, the quality of these cheap adapters is a hit and miss (simple mechanical flaws are not uncommon).
Great article. Very informative. Thanks for taking your time to write it.
wow take over the blog…….
??
??
??
TS lenses are no longer needed now. All you need is a UWA lens, then
use perspective correction in software. IQ is very comparable. I saw very good result using a 12mm UWA lens on a mirrorless APSC camera. You only lose live preview of the result. Maybe a “liveview perspective correction” playmemories camera app for us$9.9, will you buy it?
TS lenses can be used to archive deed DoF.
Sorry, but that is wrong. Software shift only works if the subjects are in one layer (parallel to sensor). For example on a street with a vanishing point every house lenas different, so it’s not possible to correct in software.
I am not sure this is accurate. If you think for a minute about the perspective distortion introduced by tilting the sensor upwards it introduces the same amount and strength all facing the same vanishing point.
(edit: of course software will not solve the focus plane issue which is still an advantage to actual tilt and shift movements)
So when one compensates for this tilt it applies across the board, regardless of the original houses as their relationships to each other and the position of the camera remain.
What is an option and one I have tried is to use the HR mode in the mark 2, apply the image adjustments and reduce to say 4000px on the short end. You get a very sharp, distortion free image: eg:
IQ might be comparable on a smartphone/tablet screen, but if you are doing this kind of photography for a customer, then you need the best IQ from the beginning, relying on pp corrections only for minor tweaks.
It’s like post production: PS can help, but won’t turn a wrong image into a right image.
A very nice article!
Nice article. But is it just me, or do a lot of those example pictures seem to have been overcorrected? Buildings go outward at the top pretty much in every picture…
I suspect the examples are to illustrate just how much lens movement one can expect when using a DX lens in tight confines… i always assumed a FF lens would be a requirement for doing this sort of work on m4/3. In actual use when photographing architecture with a T/S lens you would keep a very slight amount of backward camera tilt to avoid the top heavy look you see
Rectilinear lenses with very wide AOV always produce this effect (using a shifted smaller sensor on a lens for a larger format is like taking an image with a very wide rectangular lens and then crop off part of one side).
The reason for this effect can be easily illustrated by thinking about how a balcony without railings (or more generally with railings that don’t obscure the view, eg, by using glass walls) high up on a building (ie, very off-centre in the image) looks like from the position of the camera. The camera, as any observer from the same viewpoint, sees the bottom-side of the balcony but not the topside, it also doesn’t see the lower half of any door opening from the building to the balcony.
So, the viewer of the image taken with such a setup and subject sees no converging lines (as the image is corrected optically to be rectilinear) but it sees the bottom of the balcony (or anything sticking out from the building, including smaller-scale structures in the facade). Thus one part of your brain is telling you that you view the object straight on (ie, without tilting your head) and another part is telling you that you are looking up as you wouldn’t see the underside of things (and not the topside).
This is why shift-lenses (or more generally extreme angle rectilinear lenses) have their limits in trying to naturally display a 3D object (a perfect 2D object wouldn’t have the problem illustrated by the balcony example, however few objects a perfectly 2D, slight surface structures are often revealed by the shadows they create).
When using extreme shifts, I typically tilt the camera back ever-so-slightly.
Very useful article. T/S lenses are always better than software correction and I use them all the time with my Nikon. But I’ve hesitated to spend on an adapter for m4/3 because I thought a FF lens was a requirement and the widest available would only give a modest 28mm equivalent view. Knowing this is tested and works with an APS-C lens makes it much more attractive. Another option might be a simple shift adapter. This may eliminate the flat front camera requirement and would certainly save on the adapter cost
there are simple shift adapters out there which costs less. but i could find any which offers handling of the aperture, which is very important.
HCam offers the Master T-S system for Sony A7x bodies with Nikon 14-24mm lens and manual aperture control. They now offer the Canon 11-24mm as well, and are working on the Tamron 15-30.
Nice use of the GM1 as a digital back! (If Oly ever makes the Air with IBIS, and sell it outside Japan, that would be another exciting alternative.)
@Lang, few words on the actual handling in the real world would be appreciated. (To me this combo seem to be somewhat unmanageable without, for example, remote control with a smartphone.)
the GM1 is in dead not the ideal camera for professional purposes. it is very small and misses a lot of useful buttons compared to cameras like the GH4 or the EM1. but the monitor is good and focus peaking and the loupe function allow you to focus precisely. with the guide lines and the built in 2-axis electronic level it is also nothing complicated to get the lines of the building straight.
i always use the 2 sec self-timer.
i don’t think that things get easier if you would use the remote app.
regarding the olympus air you are absolutely right. for exactly such purposes it might be ideal to use a remote controlled body.
The GM1 is better than a lot of people will believe. Street photography, stealth shooting, light travel alternative – handling is a bit complicated if you have bigger fingers though… 🙂 Nice article.
Beautiful buildings, and such a good article Thanks! But such setups make my head blow up, I am just not smart enough haha. I wish Oly would just release an ultra wide tilt shift lens and make our lives easier !
The big advantage here is the zoom capability, which makes a wide range of useful focal lengths available for camera movements in one lens setup.
Can you clarify what you mean by “compendium”? A compendium is a list. But here it appears to be a … protector for the front lens element?
Compendium is a bellow-style lens shade. Here is some examples on B&H photo: http://goo.gl/HB52FZ
Correct! (It may or may not have a filter holder.
“Compendium” is a somewhat vintage name for the filter/accessory holder systems such as Cokin, Lee etc.
Why is a tilt-shift better than software correction? An honest question, I am not a serious photographer at all.
software solutions are fine for minor shifting. but if you want to shift as much like the examples below you would loose a lot of image quality – to much for printing them in magazines or books.
a second problem is the fact that an image looks very different after strong shifting. and its almost impossible to imaging how the final photo will look after shifting, sometimes they look nothing else then ugly. the risk of frustration is simply smaller if you can prove this already while shooting.
Tilting allows you to change the depth of field plane. In a normal lens everything that is in focus is along a plane perpendicular to the axis of the lens. When a lens is tilted you can alter the angle of the plane in which everything is in focus. This can’t be duplicated with software. Focus stacking in software is close, but the same.
Do you have any examples of DOF control through tilting? Does the peaking function give you a good idea of what is in focus when tilted?
A very ingenious solution! Thanks.
i made just one tilting test. i applied the scheimpflug rule as i did in the time i used a sinar camera. focus peaking worked fine and is actually a good instrument for controlling.
That is so cool. Thanks for the follow up!
cool post! but when I look at the specs of the Sigma 8-16 lens on the Sigma website it reads “Aperture Ring – Nikon Mount -NO” are there different versions?